From the top bar select go and select Connect to server
This will bring up a menu as below
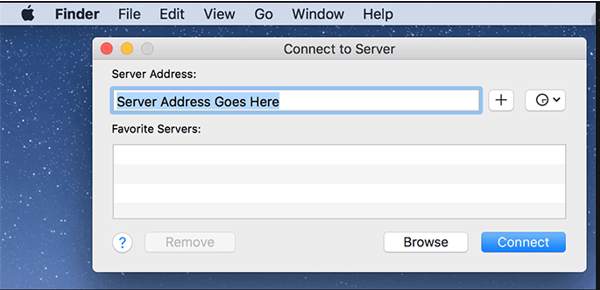
Now type your server address which will look something like this smb://316.2.64.87/shared
(In MAC for the server address we use forward slash and need to specify the file share type “smb”)
Click connect –
You now will see a login in screen enter your login details you have been provided
Once you have entered the details you will now see the shared folder on the server in finder
The drive is now connected and will see this in finder.
Below will go through how to make the drive persistent this means you will not need to do the above set up each time you log in.
To make this drive persistent Click on the Apple icon in the top left-hand corner
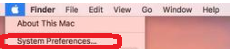
Click on system preferences
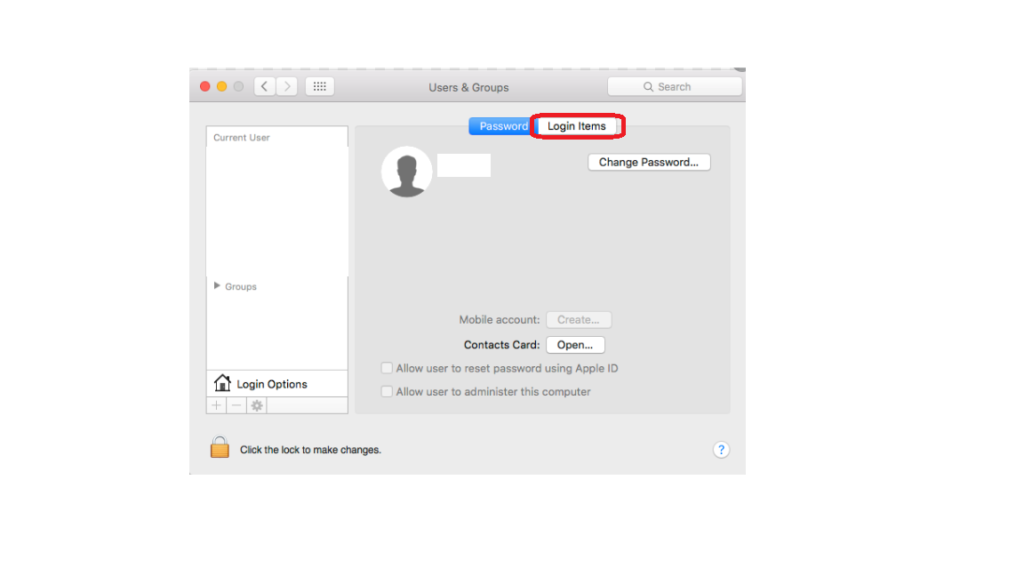
Now Select Users & Groups
Once that window has popped up you want to select login items from the right-hand side
Now select the plus + sign at the bottom That will bring up the finder window where you will see the IP address of the server then select the folder from the server
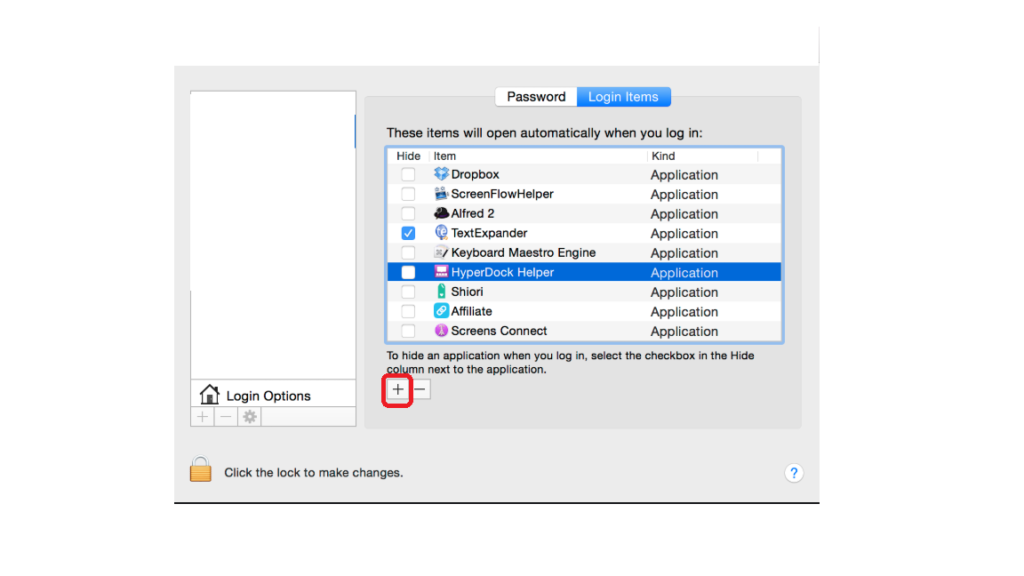
That folder will now appear in the list of items that will open when you log in to your MAC
Select on that folder and make sure that it is ticked.
Once that has been done lock the changes to save what you have done
Now that Server and folder will always be visible.
To make a short cut for the folders on the server
Click on Finder and then choose preferences and then tick the connected drives box and that will bring up a short cut to your Server folders on your desktop.